
Setting up Supabase with Next.js and Vercel
In this article, you'll learn how to connect your Supabase project with your Next.js app hosted through Vercel. If you haven't set up a Next.js app yet, you can follow the official instructions to scaffold out your app.
Setup
Before we start, you'll want to make sure you have an account on Vercel and Supabase. We'll begin by adding your project to Vercel and creating a new Supabase project.
Creating a Vercel project
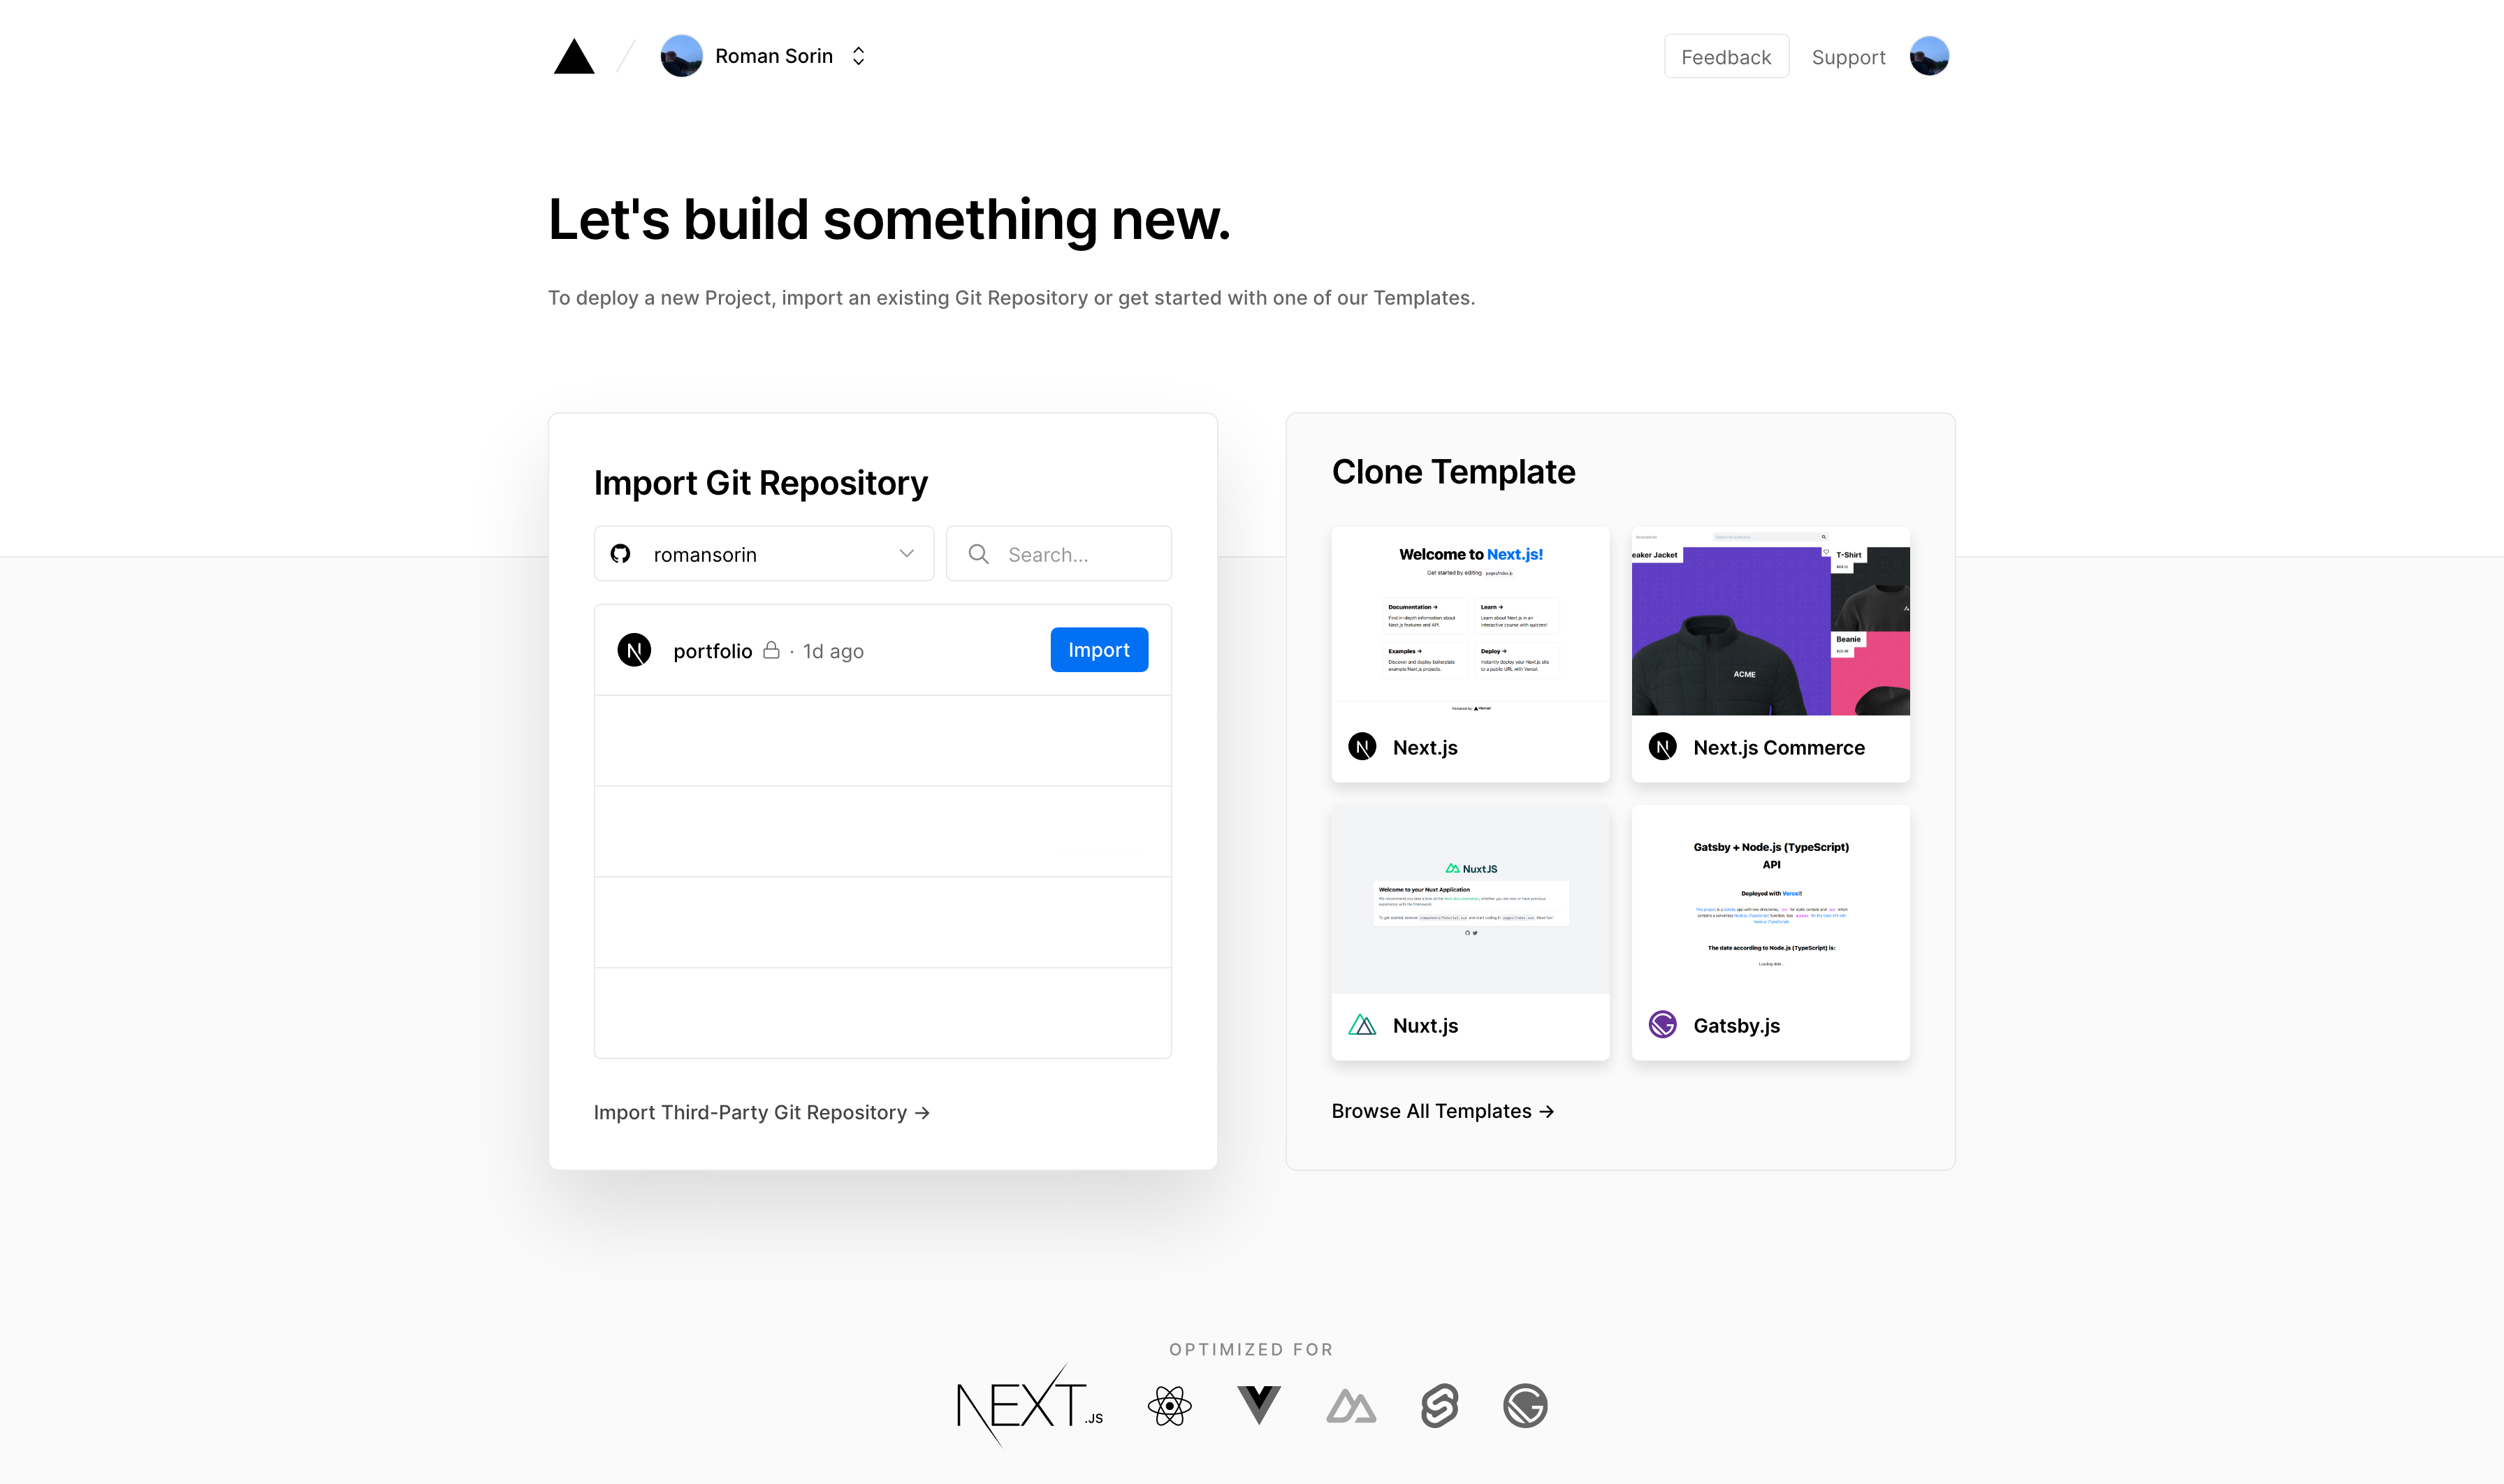
Head over to your Vercel dashboard (https://vercel.com/dashboard). From here you'll want to select "New Project" and import your project's Git repository or use one of the templates to create a new project.
Creating a Supabase project
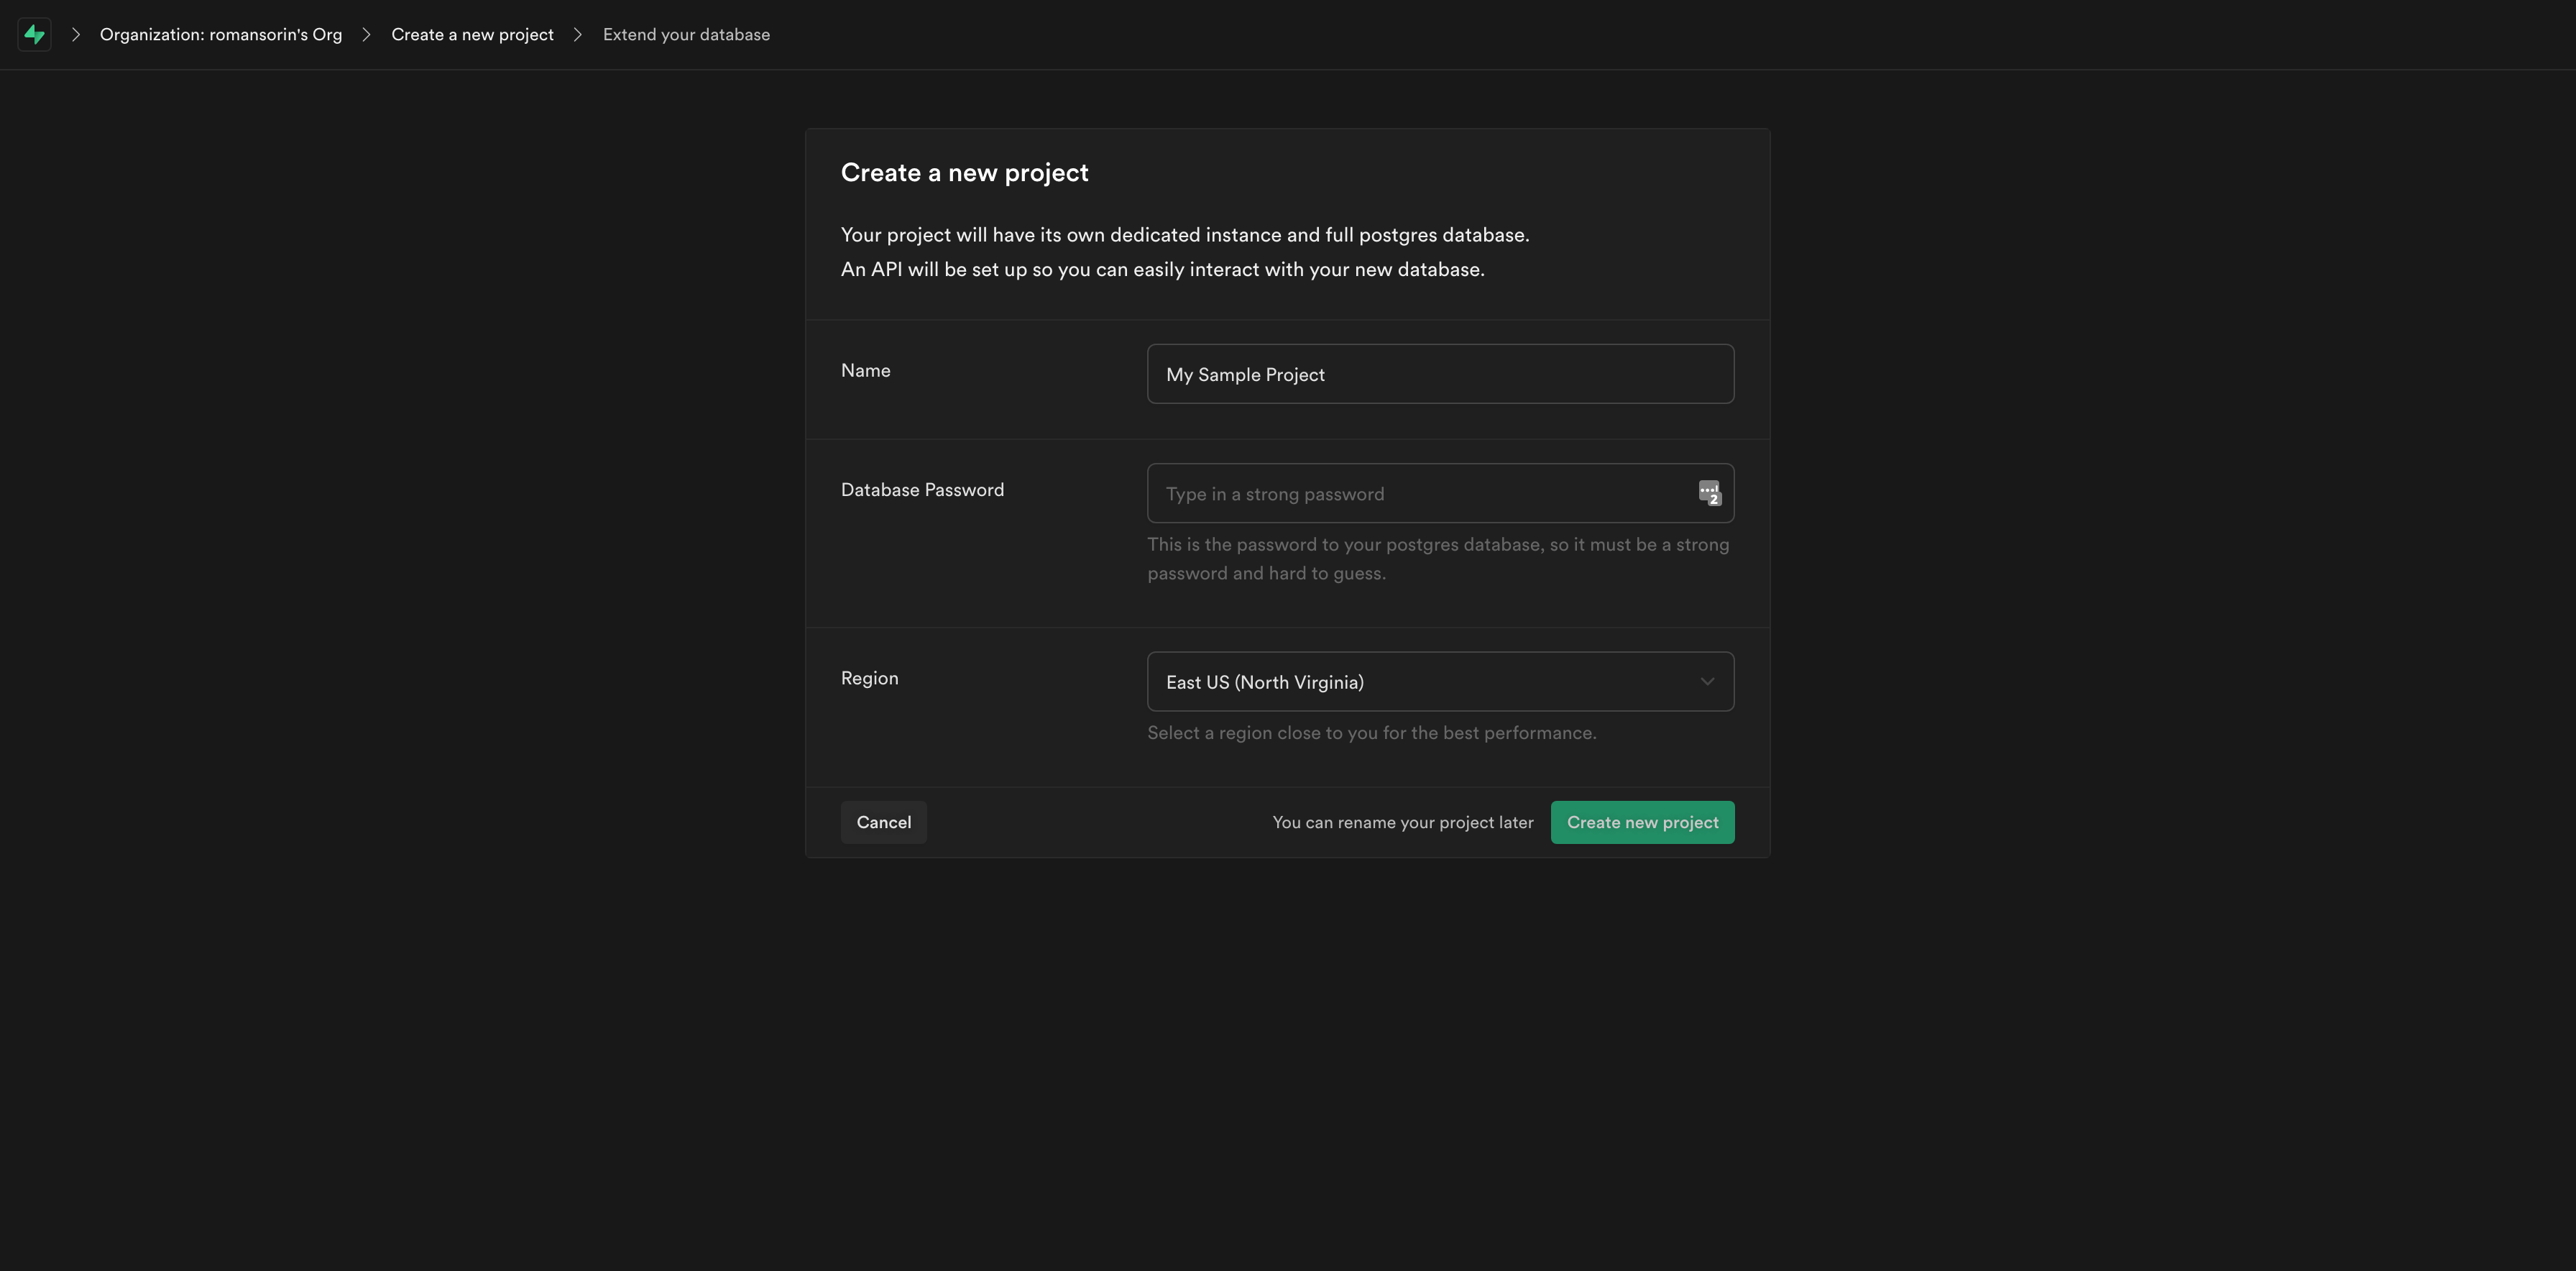
After creating a Supabase project and setting up an organization, you should be able to see your projects in the dashboard (https://app.supabase.io). Select "New Project" and set a name and database password. Once you're finished, hit "Create new project" and you'll be taken to your project's dashboard.
Configuration
Get your Supabase API keys
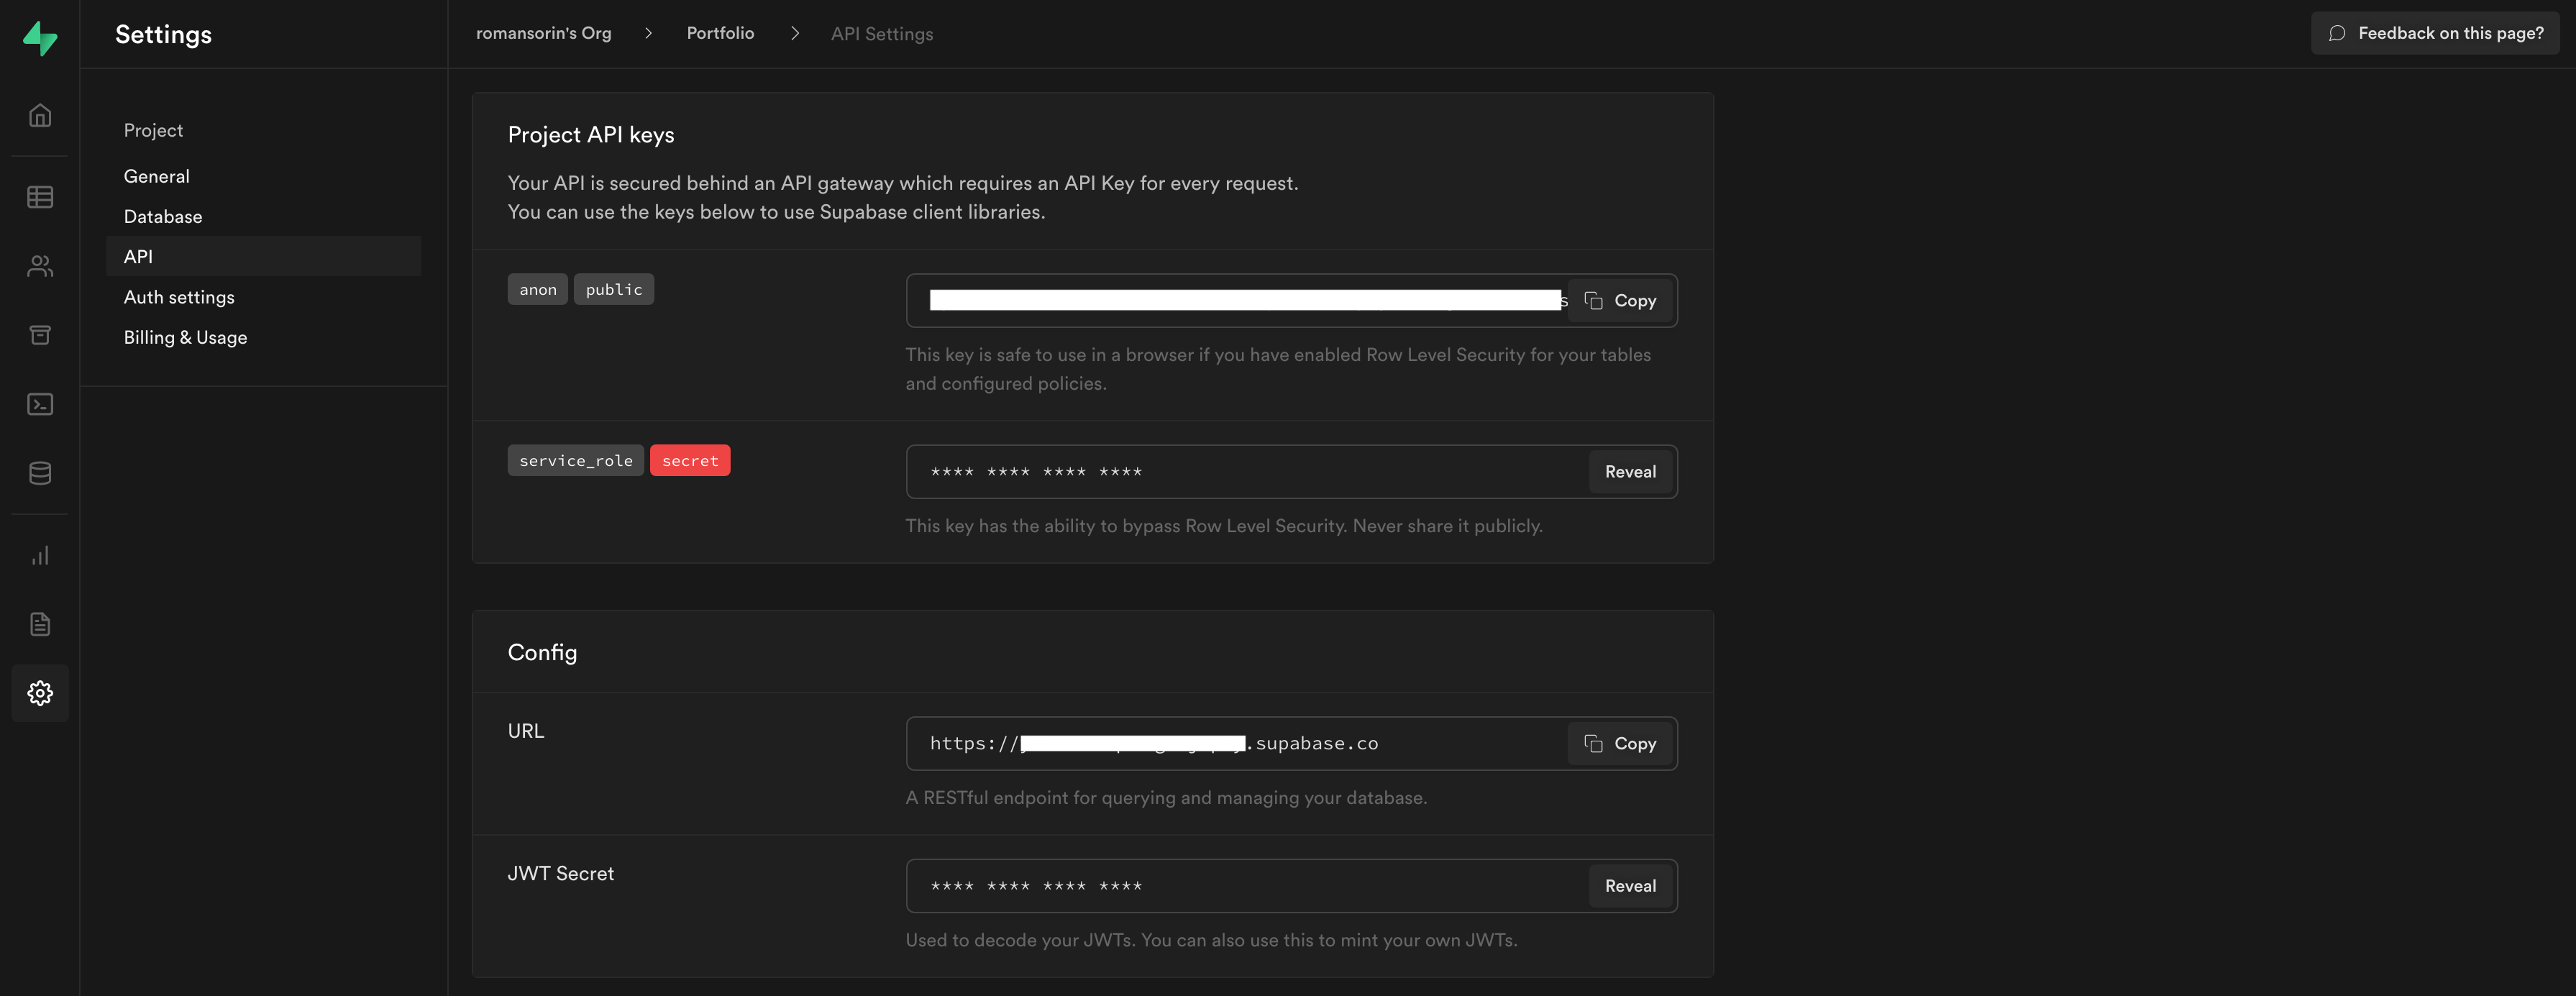
You'll need the Supabase API key and URL to continue. You can find this by selecting Settings in the sidebar (cog icon), and then selecting "API" in the menu. Copy the "Project API keys → anon public" key, and the "Config → URL" field. This will allow us to connect to your Supabase database later.
Set your Supabase site URL
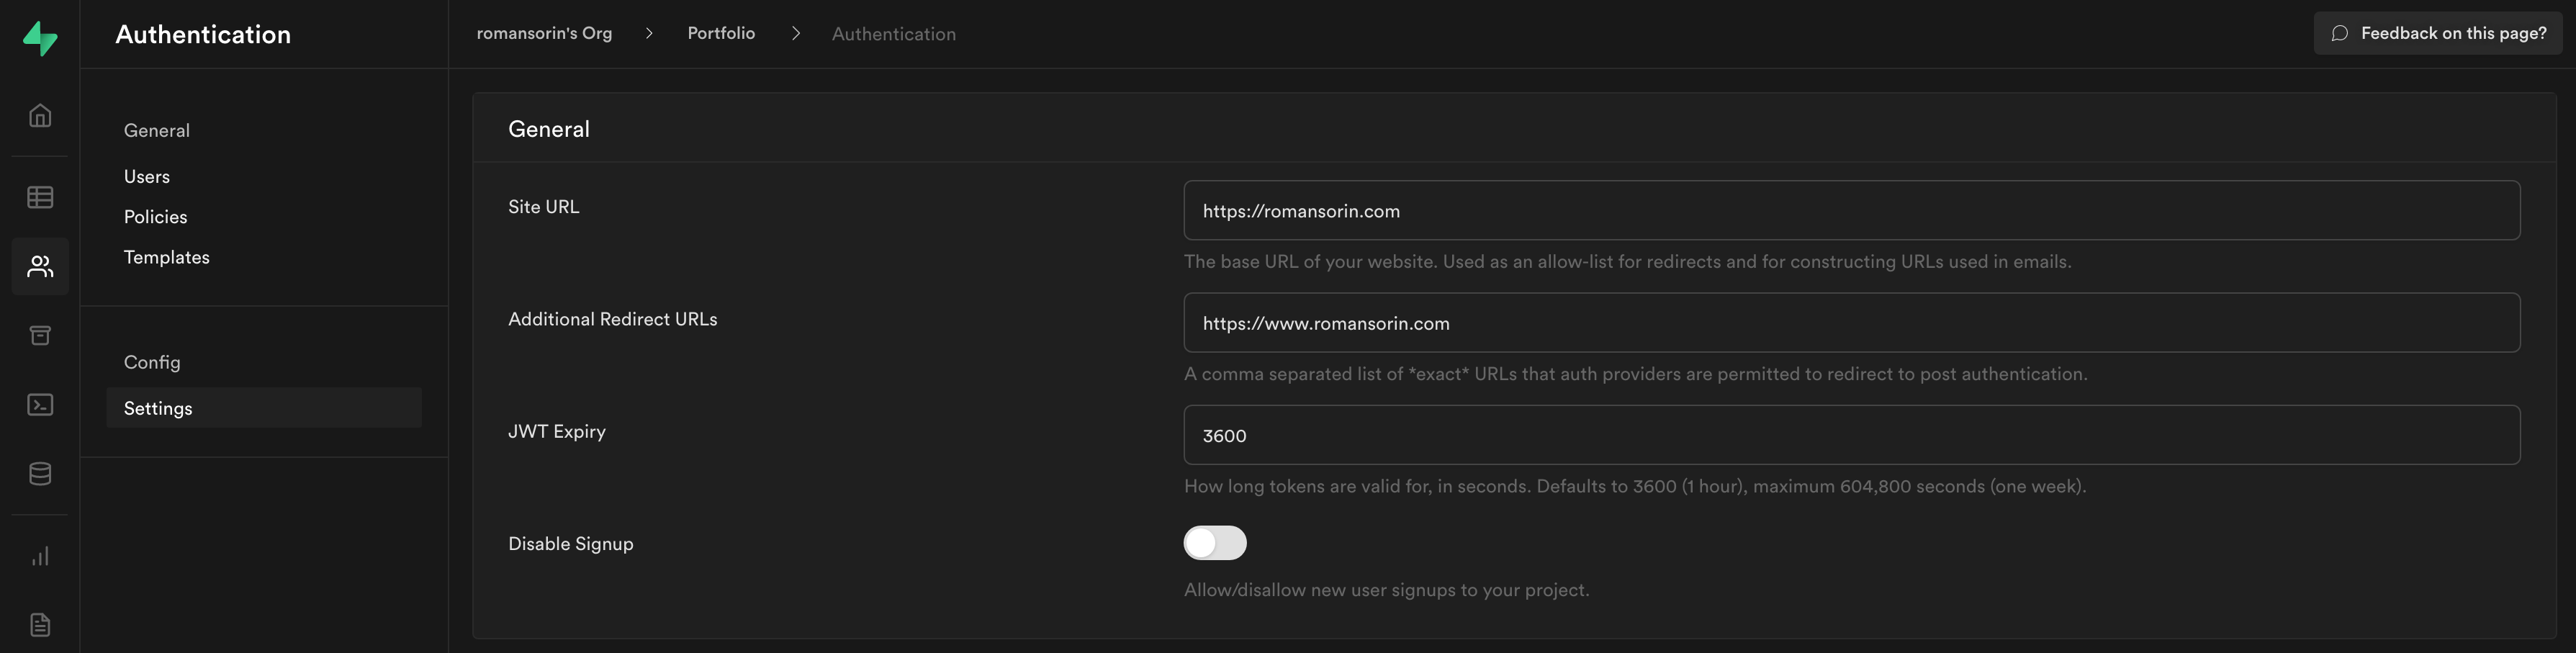
If you're using Supabase authentication or emails, you'll want to set your site's URL in the settings. You can set this by selecting Authentication in the sidebar (person icon) and selecting "Settings" in the menu under Config. Enter your site's domains in the "Site URL" and "Additional Redirect URLs" fields.
All set! We now have everything that we need from Supabase. You'll still need to set up your authentication or database tables if you haven't, but we have the basic information we need for interfacing with the database in your app.
Adding the Supabase keys to Vercel
For deployments, you'll need to add the API keys that we copied earlier to your environment variables.
In Vercel, navigate to the "Settings" tab under your project. On this page, select "Environment Variables" in the menu, and add these keys to your project:
NEXT_PUBLIC_SUPABASE_URL
NEXT_PUBLIC_SUPABASE_ANON_KEY
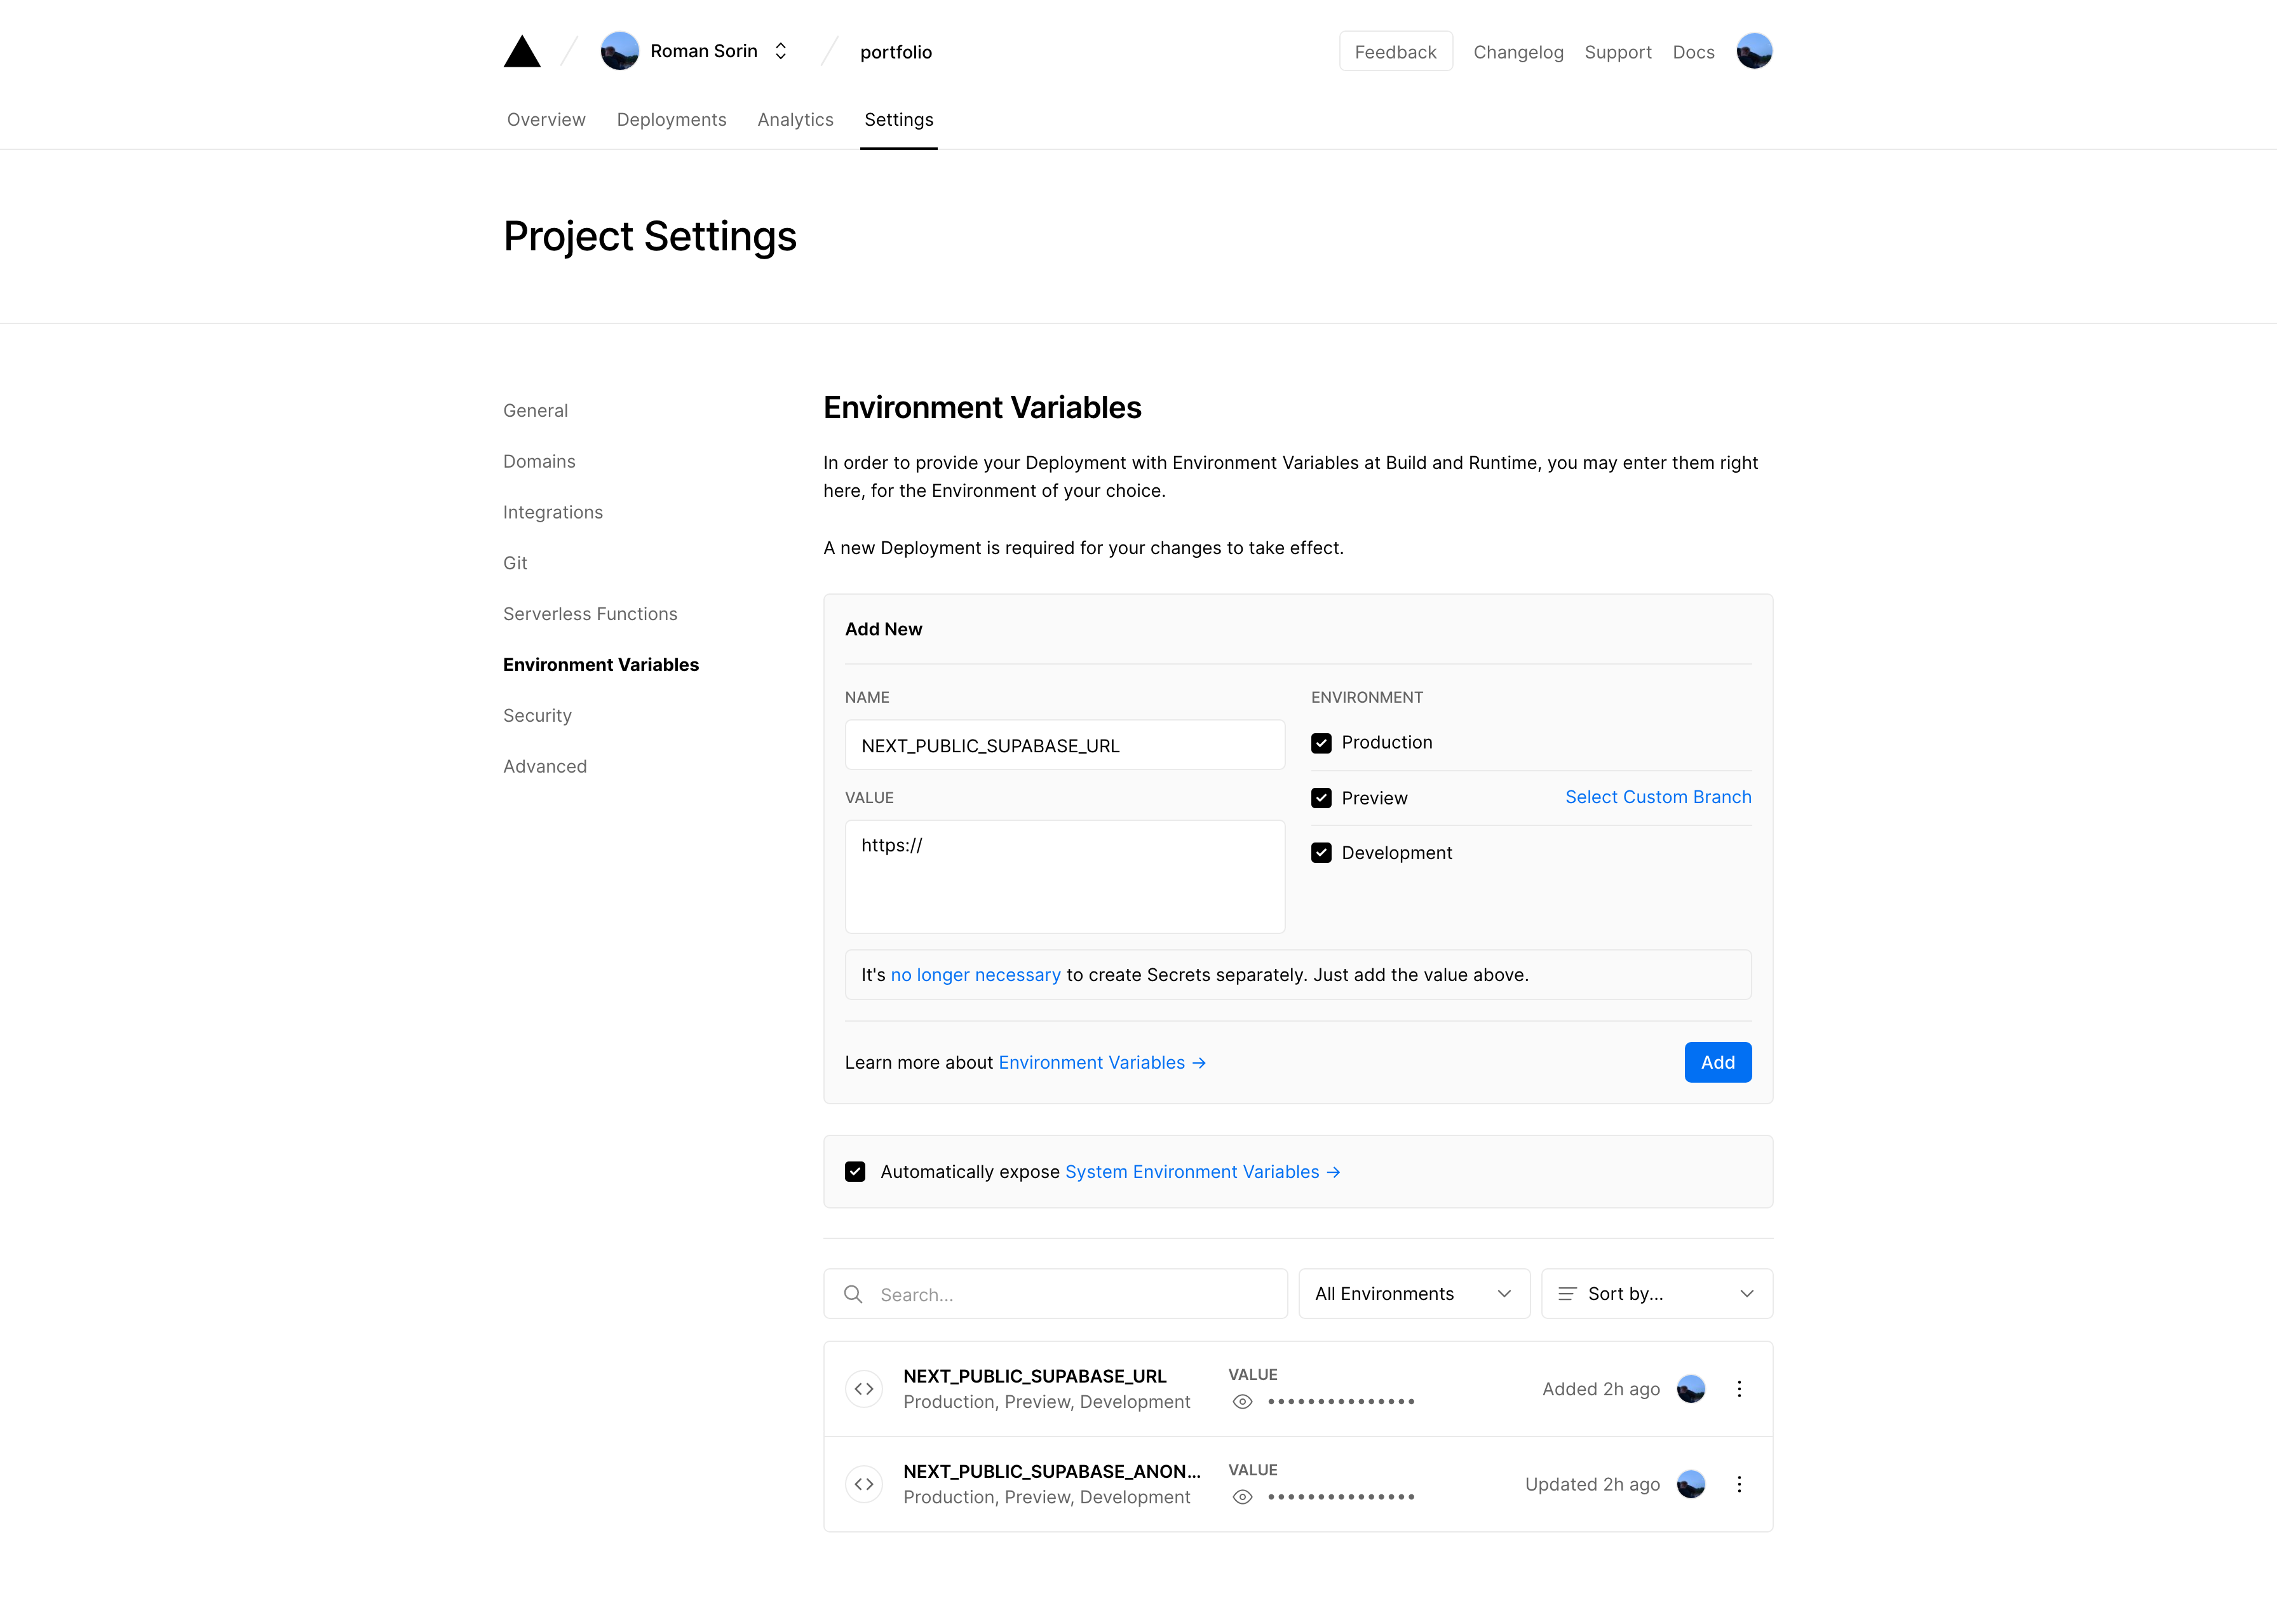
You can choose to apply it to all environments or have different keys across environments. These changes will only apply after the next build.
Adding the Supabase client to your app
Adding Supabase to your app is simple: we're going to import the Supabase library, set the environment variables, and initialize the Supabase client.
- Start by adding the
@supabase/supabase-jspackage to your project (yarn add @supabase/supabase-jsornpm install @supabase/supabase-js). - Create a
.env.localfile with these keys (or add it to your existing .env):
NEXT_PUBLIC_SUPABASE_URL=https://xxxxx.supabase.io NEXT_PUBLIC_SUPABASE_ANON_KEY=xxx
Replace the values for these keys with the API keys we copied earlier.
- Create a file in your project named
lib/initSupabase.js. Here, we will import the package, and initialize the Supabase client:
import { createClient } from "@supabase/supabase-js"; const supabaseUrl = process.env.NEXT_PUBLIC_SUPABASE_URL; const supabaseAnonKey = process.env.NEXT_PUBLIC_SUPABASE_ANON_KEY; export const supabase = createClient(supabaseUrl, supabaseAnonKey);
That's it! Adding the Supabase client is simple, and the client is even easier to use. Now, you can do something like this:
import { supabase } from "@/lib/initSupabase"; const { data, error } = await supabase.from("posts").select("*");
Conclusion
We've covered how to easily add Supabase support into our Next.js app. Now, you have fully-fledged authentication, database, subscription support – and more – all within a few minutes of setup.